
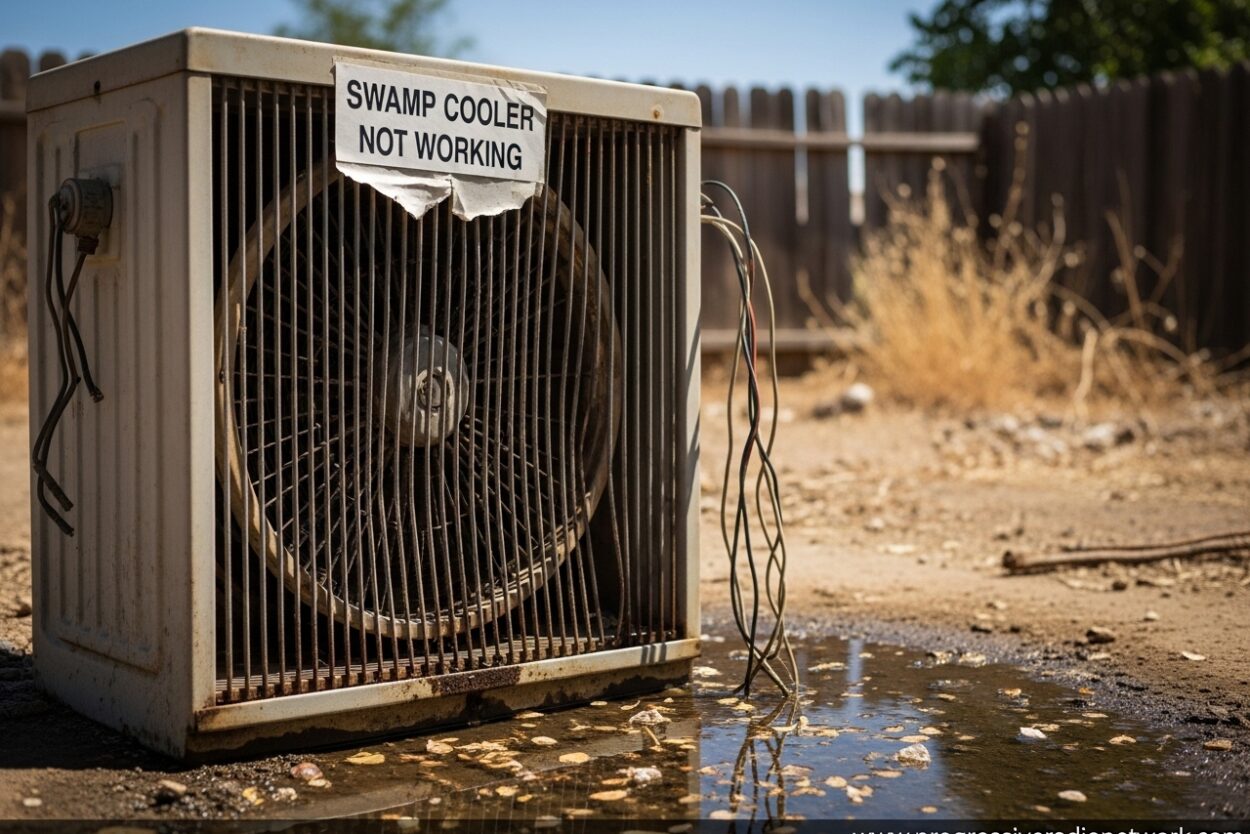
When your Swamp Cooler Not Working situation hits during peak summer heat, frustration levels spike fast. I’ve been there – staring at a 95-degree thermostat while my evaporative cooler sits silent or, worse, blows warm air like a taunting fan. This guide will walk you through exactly what’s wrong and how to fix it, saving you the $150+ service call fee and getting your cool air flowing again.
Swamp coolers (also called evaporative coolers) are simple machines, which makes troubleshooting straightforward once you know what to check. The most common issues fall into two categories: either the unit isn’t blowing air at all, or it’s blowing air but that air isn’t cool. I’ll cover both scenarios plus those mystery symptoms like strange smells or odd noises.
Swamp Cooler Not Working: Quick Diagnostic Guide
Before diving into specific problems, let’s establish which symptom you’re experiencing. This saves time and points you toward the right solution faster.
Not blowing ANY air? Focus on power, motor, and belt issues first.
Blowing air but it’s HOT? Check water supply, pump operation, and pad condition.
Strange smells or noises? Likely maintenance-related – dirty pads, algae buildup, or belt issues.
Safety first: Always turn off power at the breaker before working on your swamp cooler. Water and electricity don’t mix, and these units draw significant current. If you’re uncomfortable with any step, there’s no shame in calling a professional.
Swamp Cooler Not Blowing Air
When your evaporative cooler runs but produces zero airflow, the problem usually traces back to three systems: power delivery, the motor/fan assembly, or airflow obstruction. I’ve worked through these symptoms dozens of times, and here’s the diagnostic order that saves the most time.
Check Power Supply First
Start simple. Verify the unit is receiving power by checking your circuit breaker – swamp coolers often have their own dedicated circuit. Look for a tripped breaker or blown fuse. I can’t tell you how many times I’ve spent 30 minutes diagnosing a “broken” cooler only to find a tripped GFCI outlet or loose disconnect switch.
Test the outlet with a voltage tester or plug in a known-working device. If power reaches the unit but nothing happens, move to the motor testing phase.
Test the Thermostat and Switch
Faulty thermostats cause more headaches than they should. If your cooler won’t turn on at all, try bypassing the thermostat temporarily. Most units have a manual override switch – if the cooler runs when you bypass the thermostat but not through normal operation, you’ve found your culprit.
Thermostat replacements run $40-80 for standard models and take about 30 minutes to install. It’s a straightforward DIY repair if you’re comfortable with basic wiring.
Motor Issues: The Silent Killer
A failing swamp cooler motor often gives warning signs before complete failure. Listen for these symptoms:
- Humming but not spinning: Usually indicates a failed start capacitor (cheap fix) or seized motor (expensive fix)
- Loud grinding or squealing: Worn bearings – motor needs replacement
- Intermittent operation: Overheating motor or failing winding
- Burning smell: Motor windings failing – shut down immediately
The capacitor test is simple – if your motor hums without spinning, try giving the fan blade a manual push (with power off, then turn on and quickly spin). If it starts running with a push, the capacitor is bad. Capacitors cost $15-30 and are easy to replace.
If the motor won’t run even with a push start, or if you detect burning smells, the motor itself has failed. Replacement motors range from $150-400 depending on size and quality. I recommend upgrading to a sealed motor if you live in a humid climate – they resist moisture damage better.
Belt Inspection and Tension
Swamp cooler belts stretch and crack over time, typically lasting 3-5 years depending on usage. A loose belt slips on the pulley, reducing fan speed dramatically. Inspect your belt for:
- Cracks or fraying along the edges
- Glazed or shiny appearance (indicates slipping)
- Excessive slack (should have about 1/2 inch of deflection when pressed)
Replacement belts cost $8-15 and take 10 minutes to install. Simply loosen the motor mount, remove the old belt, position the new one, and retighten to proper tension. This is one of the easiest DIY repairs and often restores lost cooling efficiency immediately.
Don’t Forget the Damper
Many homeowners forget to remove the winter damper plate when starting up their cooler for summer. This metal plate blocks the ductwork during winter to prevent heat loss. If left in place, it blocks all airflow even if the fan runs perfectly.
Check your duct opening for the damper plate – it’s usually located at the ceiling register where the cooler connects to your home’s ductwork. Remove it completely and store it safely for winter installation.
Swamp Cooler Blowing Hot Air
When your evaporative cooler moves air but that air isn’t cool, the problem almost always relates to the water system. The cooling effect only happens when hot, dry air passes through WET pads. If water isn’t reaching the pads properly, you get nothing but a warm breeze.
Check Water Supply to Reservoir
Your swamp cooler needs a steady water supply to maintain proper reservoir level. Check these components in order:
- Water supply valve: Usually located near the water heater or where the line taps into your home’s plumbing. Ensure it’s fully open.
- Floating valve: This valve maintains reservoir water level. If stuck closed, the reservoir won’t fill. If stuck open, water overflows. Test by manually moving the float up and down – you should hear water flow when the float drops.
- Water line: Check for kinks, cracks, or disconnections. In freezing climates, lines sometimes burst during winter if not properly drained.
Replacement float valves cost $20-40 and are simple to install. If your water line is damaged, PEX tubing replacements run $2-4 per foot plus fittings.
Test the Water Pump
The water pump is the heart of your swamp cooler, circulating water from the reservoir to the distribution system. When pumps fail, pads stay dry and cooling stops completely. Test your pump by:
- Visually confirming water is circulating in the reservoir (look for movement or turbulence)
- Checking the pump outlet hose – water should flow steadily when the cooler runs
- Listening for pump operation – most make a faint humming or whirring sound
If water isn’t circulating, check the pump intake first. Debris frequently clogs the small filter screen where water enters the pump. Clean this screen and test again.
If cleaning doesn’t restore operation, the pump has likely failed. Replacement pumps cost $60-150 depending on flow rate and quality. I always recommend keeping a spare pump during cooling season – they fail at the worst possible times and having a backup saves you from sweltering while waiting for shipping.
Inspect Distribution Spider and Spray Bar
The distribution system (often called a “spider” due to its multiple arms) spreads water evenly across the cooler pads. When these clog with mineral deposits, water flows unevenly or not at all to certain pad sections.
Remove the distribution cover and inspect each arm. You should see water flowing freely from all holes. Mineral buildup appears as white or yellow crusty deposits. Clean these out with a small brush or toothpick, then flush with vinegar to dissolve remaining scale.
In hard water areas, mineral buildup happens quickly. Consider installing a water softener or using distilled water for your cooler if your local water is extremely hard. This extends the life of pumps, distribution systems, and pads significantly.
Check Pad Condition and Wetting
Evaporative cooler pads degrade over time, losing efficiency as they age. Even if water reaches them, damaged pads can’t cool effectively. Inspect your pads for:
- Mineral crust: White deposits that block airflow and water absorption
- Collapsed structure: Pads should have a honeycomb appearance. Flattened sections reduce cooling surface area
- Mold or algae growth: Black or green growth indicates poor maintenance and restricts airflow
- Dry spots: If portions of the pad remain dry even when water flows, distribution is uneven or pads are saturated with minerals
Perform the simple tissue test: hold a tissue against the pad while the cooler runs. If the tissue sticks and gets damp, water distribution is working. If it stays dry in certain areas, you’ve found your problem area.
Pad replacement typically costs $40-80 depending on size and material. Aspen pads (the shredded wood type) need annual replacement in most climates. Synthetic rigid media pads last 3-5 years but cost more upfront. I’ve found synthetic pads worth the extra cost – they maintain efficiency longer and resist mineral buildup better.
Strange Smells and Odors
Odor problems usually indicate maintenance issues rather than mechanical failure. Musty or swampy smells mean biological growth in the water system, while burning smells indicate electrical or motor problems.
Musty or Mildew Odors
That characteristic “swamp” smell comes from mold, algae, or bacteria growing in wet components. Common causes include:
- Pads not drying completely between uses
- Standing water in the reservoir
- Decaying organic matter in the water system
- Lack of regular cleaning and treatment
Eliminate odors by cleaning the entire water system. Drain the reservoir and scrub it with a mild bleach solution (1 part bleach to 10 parts water). Rinse thoroughly before refilling. Remove and inspect pads – replace if heavily contaminated. Clean the distribution spider and pump intake screen.
Prevent future odors by adding cooler treatment tablets to the reservoir monthly. These tablets inhibit biological growth and reduce mineral buildup. They cost $10-15 per season and significantly reduce maintenance requirements.
Burning or Electrical Smells
Burning odors indicate serious problems that require immediate attention. Possible causes include:
- Motor windings failing
- Overheating due to restricted airflow
- Electrical connections arcing
- Belt slipping excessively on motor pulley
Shut down the unit immediately if you smell burning. Check for obvious causes like blocked vents or severely loose belts. If the cause isn’t immediately apparent, call a professional – electrical problems in swamp coolers can create fire hazards if ignored.
When to Call a Professional
Many swamp cooler repairs are DIY-friendly, but some situations warrant professional help. Based on my experience, call a technician if:
- The motor needs replacement and you’re uncomfortable with electrical wiring
- You’re dealing with complex ductwork issues beyond the damper plate
- Electrical problems persist after checking breakers and switches
- The unit is a roof-mounted model and you lack safe access
- Your cooler is part of a hybrid system with refrigerant components
Professional swamp cooler service typically runs $100-150 per hour, plus parts. Motor replacements usually total $400-700 including labor. Complete unit replacements range from $1,500-3,000 installed, depending on size and complexity.
Get multiple quotes before approving major repairs. Some HVAC techs push for full replacement when repair would suffice. If your unit is under 10 years old and the frame is in good condition, repair is usually more economical than replacement.
Preventive Maintenance Schedule
Most swamp cooler problems stem from inadequate maintenance. Following this schedule prevents 90% of common issues:
Monthly During Cooling Season
- Check pad condition and replace if deteriorating
- Inspect reservoir for debris and clean if needed
- Verify pump operation and water distribution
- Check belt tension and condition
- Clean or replace treatment tablets
Seasonal Startup (Spring)
- Remove winter cover and damper plate
- Inspect all components for winter damage
- Replace pads annually (aspen) or inspect condition (synthetic)
- Check belt and replace if cracked or worn
- Test pump and motor operation
- Clean reservoir and water lines
- Lubricate motor bearings if applicable
Winterization (Fall)
- Drain all water from reservoir, pump, and lines
- Disconnect water supply and drain line to prevent freezing damage
- Clean pads and reservoir to prevent biological growth during storage
- Install winter cover or damper plate
- Turn off power at the breaker
- Inspect roof mounting for any loose fasteners or water damage
Annual Professional Inspection
Even if you handle most maintenance yourself, an annual professional inspection catches issues before they become emergencies. Technicians check electrical connections, measure motor amperage, test capacitor strength, and inspect components that homeowners often miss. The $100-150 inspection fee typically saves several times that amount in prevented repairs.
FAQ
Why would a swamp cooler stop working?
Swamp coolers typically stop working due to pump failure, motor issues, or pad problems. The most common causes include a clogged water pump (mineral buildup preventing water circulation), a failed motor capacitor (causing humming but no fan movement), loose or broken belts (reducing airflow), or severely deteriorated pads (preventing evaporation). Power supply issues like tripped breakers or faulty thermostats also cause complete failure. Regular maintenance prevents most of these issues.
What is the average lifespan of a swamp cooler?
The average swamp cooler lasts 10-15 years with proper maintenance. Units in harsh climates with extreme heat or hard water may only last 8-10 years. Key components have shorter lifespans: aspen pads need annual replacement, belts last 3-5 years, water pumps typically fail after 5-7 years, and motors last 8-12 years. Synthetic media pads extend pad life to 3-5 years. Regular cleaning, annual inspections, and proper winterization significantly extend total system lifespan.
How much does it cost to replace a swamp cooler motor?
Swamp cooler motor replacement typically costs $400-700 including professional installation. The motor itself ranges from $150-400 depending on size, horsepower, and quality (sealed motors cost more but last longer in humid conditions). DIY installation saves $150-250 in labor but requires electrical wiring knowledge. Additional costs may include new belts ($15), a new capacitor ($25), or pad replacement ($50-80) if other components need attention during the repair.
How do I tell if my swamp cooler motor is bad?
Bad swamp cooler motors show specific symptoms: humming without fan spinning indicates a failed start capacitor or seized motor, loud grinding or squealing suggests worn bearings, intermittent operation points to overheating windings, and burning smells mean motor failure is imminent. Test by manually spinning the fan blade (with power off) – if it spins freely, the motor might work with a new capacitor. If it’s stiff or seized, the motor needs replacement. Motors drawing higher than rated amperage also indicate impending failure.
Conclusion
Dealing with a Swamp Cooler Not Working situation frustrates every homeowner who relies on evaporative cooling. The good news? Most problems trace back to just a few components: water pump, motor, belts, or pads. Systematic diagnosis saves time and money, and regular maintenance prevents most issues entirely.
Start your troubleshooting with the symptom-based approach outlined above. Not blowing air? Check power, motor, and belt first. Blowing hot air? Focus on water supply, pump operation, and pad condition. When in doubt, work through the diagnostic checklist systematically rather than randomly replacing parts.
Swamp coolers provide incredibly efficient cooling in dry climates when properly maintained. They use 75% less energy than traditional air conditioning, making them worth the maintenance effort. Follow the preventive schedule outlined here, and your cooler should provide reliable service for 10-15 years before needing complete replacement.
Leave a Comment